Some of the internal walls are load bearing so have to have a proper foundation.
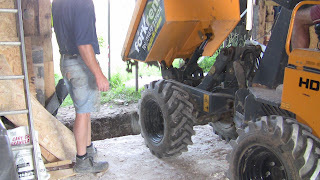
Got a couple of machines in to save the guys having to do loads of digging and barrowing. (Not just for my benefit, honest)
Dumpering it in is quicker than barrowing. The cost of the mandays saved pays for the hire of the machine. At least, that's the theory.
Short back and sides please.
That'll do nicely, thank you.
To prepare a delightful ground floor you first skim off the top layer of soil and discard. Pour in a lashings of hardcore - be generous, but don't overdo it. On top of that you add a dash of blindng which can be coarse sand or, if you're fortunate enough to have it, hogging. The next bit is best done by hand (always more pleasing) but if your guests are arriving soon, you can use a whacker plate, one of those handy labour saving devices. Beat the blinding till a really firm consistency is achieved.This is the most important part of the process and can make the difference between a truly sumptuous ground floor and something rather ordinary. Next comes a coating of damp proof course - DPC to the cognoscenti. If you want a really solid result you can add an optional layer of steel reinforcing mesh. Top the whole thing off with cement and smooth the surface with a knife. If you haven't got a big enough knife, lengths of 2 by 1 batten will do. Leave to set overnight, and voila - a firm base (oversite) for the rest of your floor construction, of which more anon.
Dumpering in the hardcore
Hardcore ready for blinding.
The doorways are the sole remaining sections of the perimeter of the barn which need a solid foundation. Now the birdcage is out of the way they can get at them.
Pouring concrete in doorway foundation
The infamous rammed chalk revealed yet again. Looks like icing, doesn't it.
We’re having a double sided fireplace in the middle of the barn and the structural engineer has included the brick pillars of the fireplace as load bearing supports for the first floor. Basically the fireplace will hold up one end of a steel beam which will, in turn, hold up the first floor joists. The brick fireplace will not only have to carry the flue/chimney, it will also carry half the first floor. Perhaps we should call it Atlas. Anyway, it needs a good solid foundation. When the guys began to dig out that area of the chalk floor (as permitted by our planning permission, I hasten to add) guess what they found.
Remnants of a brick wall just below the surface. Quite apart from the curiosity of such a find, it did imply that the soil in that area couldn’t be regarded as virgin, undisturbed subsoil. So the structural engineer insisted on a 1m deep slab of concrete, 3m wide by 2m long, for the foundation for the chimney.
When we saw the hole we did think we might scrap the fireplace and keep it as a swimming pool. But that might cause problems with the first floor joists (like, there's nothing to hold them up) so, reluctantly, we gave that up as a bad idea.
The doorway between the kitchen and the family room goes through the internal plinth wall.
Now you don't see it.
Now you do.
Note the change in levels. The site slopes north to south but the difference in levels here is mainly caused by the requirement to retain the chalk floor which is in the middle of the barn.
Our phriendly feasant standing guard over our skip.
And finally,


No comments:
Post a Comment