Sunday 29 January 2012

Week Thirty Seven – Of Purlins & Plasterboard

A hole in ceiling plasterboard for the heat recovery vent – 7 metres up. Gulp.


Plasterboard is coming thick & fast right now. They get through it like there was no tomorrow. At this rate there won't be.


Tacking the ceiling apex of the roof required a high scaffold to be erected - shades of the birdcage of fond memory.


There's a great view from the top - if you manage to get up there.


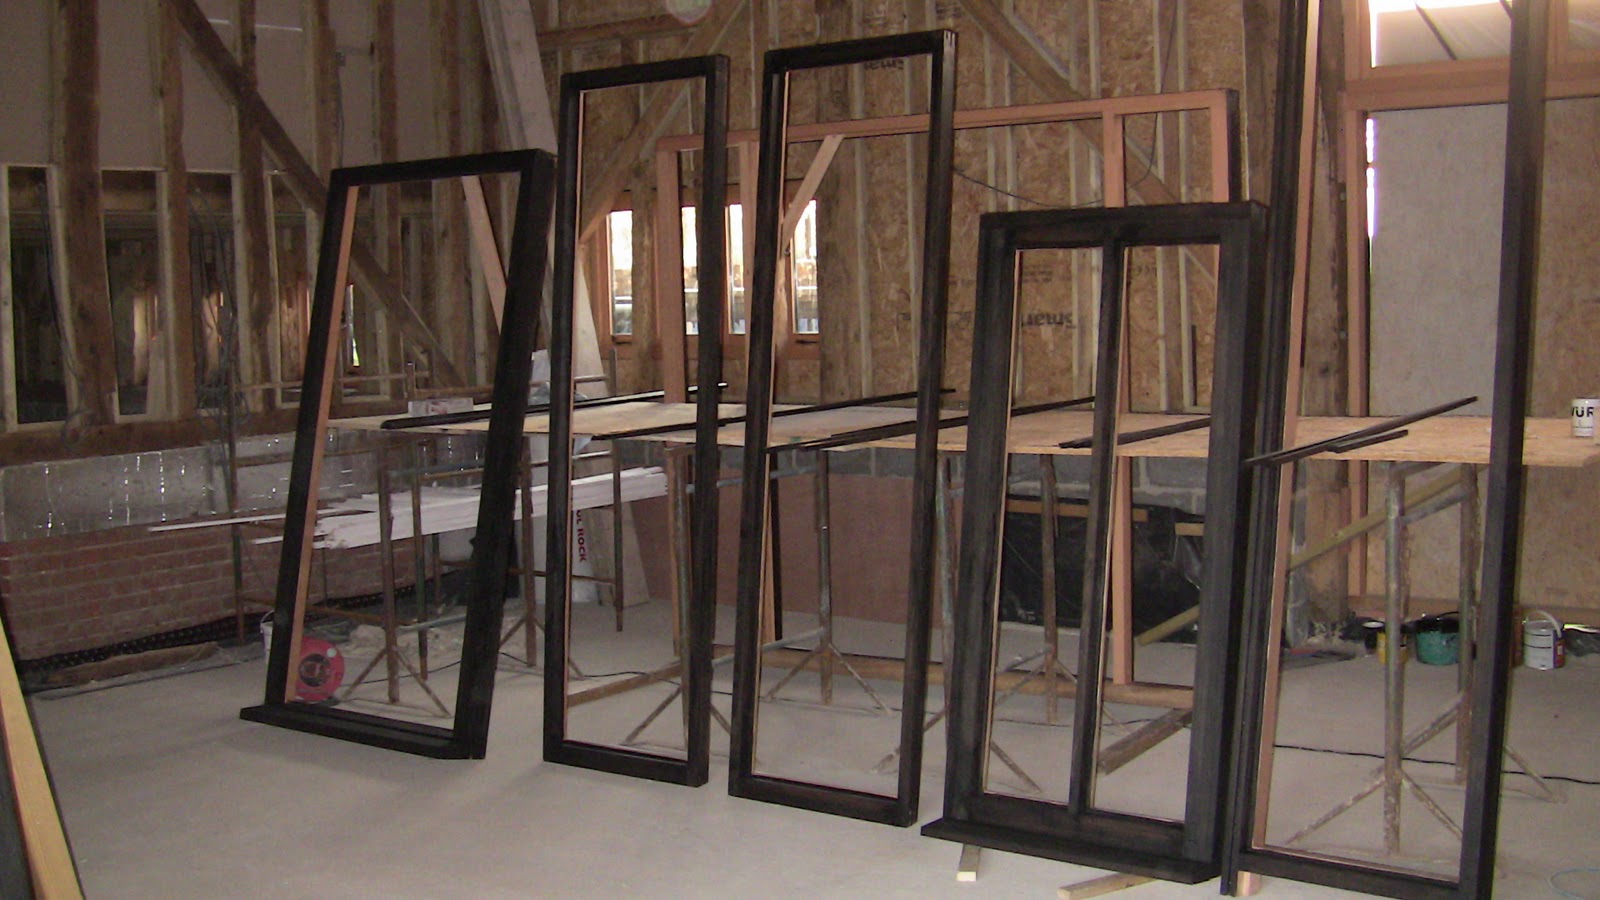
The Glazier has been on site this week. We now have glass over the east cart door.


... and and over the west cart door.


When is a door not a door? When it's a window.


Long discussions over how much of the purlins to show. You will recall that the purlins have been beefed up with two extra timbers all round. The 2 new rows of purlins are fixed to the old one, sitting above. And they're softwood and a much lighter colour than the original oak ones. So, the question was, how much to show, how much to cover up with plasterboard. All three? None? We decided to bring the plasterboard down over the new ones and leave the old purlins exposed. Looks great doesn't it?


Here's the west door glazing from the inside with the open studwork wall of bedroom 2.


The ground level at the north end is a good couple of metres higher than finished floor lever in the utility room, as you can see. Gonna cause problems when it comes to building the wall at the back. Better speak to our engineer again.


Larder with door lining in place. Doesn't look much like a larder yet. Only have faith, I keep telling myself. All will be well, all manner of things will be well.


Revisiting floor finishes. We recently a visited friend's barn which has just been finished. They've got a sandstone ground floor - it looks really good. So ... we've been to see possible sources of natural stone, sandstone, limestone and others. We would prefer limestone. We thought about travertine but are still concerned about maintenance for all natural stone. You have to seal it and re-seal it from time to time. Also we once had a natural slate floor and it was a right pain. Looked great but soaked up anything you spilled on it (not good in the kitchen) and if you dragged anything across it you left scratch marks.  Also natural stone is  much more expensive per sq m to lay, and since we have a lot of sq m, you're pretty soon talking big money. As it happens, we would really have preferred engineered oak but it's too good an insulater to put over underfloor heating. So, you pays your money and you makes yer choice.

We're also still anguishing over internal doors. The aforementioned barn had solid oak framed leged and braced doors (with Suffolk latches). And I have to admit, the FLB doors looked really good. But solid oak is expensive and, again, we have a lot of doors to buy. And what about architraves and skirtings - do those in oak too? Or softwood, paint them or leave them natural? Decision decisions.

There have been length discussions with our builder over the counter battening in the ceiling - how much woodwork to reveal? It would be nice but time consuming and expensive to batten out the studs and rafters, so as to show them all. The rafters not all in same plane so some have to be packed out - which implies covering them up with plasterboard. Complicated.

And finally


Monday 23 January 2012

Week Thirty Six – Bird's Eye View of the project

Another flight this weekend - beginning to get the hang of this aerial photography lark


And a bit closer. View from the east side of the projections giving the barn its 'E' shape. Farmhouse to the right, north, our field to the left, south.


More windows were glazed this week.


External doorframes painted and ready to be fitted


Open studwork that's no longer open


Bedroom wall with diagonal stud that used to run right across the doorway.


Plasterboard creating the ceiling up in the apex.


Wall and ceiling plasterboard in the master bedroom.


Door frame around the east central cart opening, with wonky studs above.


Vapour check prior to plaster board


Bedroom wall with main studs showing. There's a place in Suffolk called Lavenham which is renowned for its medieval houses, timber framed lathe and plaster walls and ceilings. This bedroom reminds me a of some of those buildings, or is that rather too pretentious? (The plastic chair and the drum of wood preservative really set it off, don't you think?)


Skirt pinned up over plinth to protect the brickwork when painting boarding above. Clever idea huh? You just have to be uber-careful when doing the bottom board ...


Doesn’t look much like a kitchen yet, does it?


Sunset over the fields at the back. Reminds me of a postcard from Hawaii entitled 'Another Lousy Day in Paradise'. We're wondering what to call the barn. How about Paradise Barn? Maybe not.


 Issues that have kept us awake this week are:- water quality (again) and how much filtration/treatment we are going to need to put in - we've received conflicting advice and the internet doesn't really help; budget. If you've watched any of the numerous programmes on TV dealing with these kind of projects, you'll know that staying within budget is frequently a problem. Ours is no exception and we're trying to keep a tight rein on expenditure. But it's in the nature of this kind conversion, which involves a not inconsiderable amount of restoration, to find that there's more to do than seemed the case at first, and you can't do everything.

And finally


Monday 16 January 2012

Week Thirty Five – Doors, Windows and Ducts

Another flight, another picture. I really should beg borrow or buy a decent camera ... Still, you can just about make out the barn in front of the wing, with the farmer's fields behind the barn and our field to the left.


Back on terra firma, the external door frames have arrived on site.


Heat Recovery Ventilation requires ducting to every room, either to extract 'foul' air or to inject 'clean' air. This means running some fairly large pipes round the building. The original design specified rigid plastic ducting. We couldn't see how to do that given the constraints of an existing timber frame building with steel beams, wall plates, sole plates, 8 by 8 trusses and posts all over the place. So we opted for a flexible ducting system which is more ... well ... flexible. It'll still have to be boxed in, though, which is a bit of pain but there's no real alternative.


Large, silvery insulated ducts connect the heat recovery units to the outside air vents, in and out.


Narrower, red, ducting fans out to all corners of the building. The narrow ducting is connected to what they call a 'plenum box' which is a sort of multiple adaptor. It has a big silver duct at one end connected to the heat recovery unit and all the individual red room ducts connected to the other end. The plenum box is just that, a box. There's nothing in it except air.


Electric first fix is done. Bit a spaghetti junction in places.


Big milestone this week - some of the glazing has arrived.


And some windows have been glazed.


Another glazed window. Great isn't it? Real windows, real glass. Amazing.


 Out the back the crop is already sprouting.


And here's how it looked literally 2 days later. It has been so warm this year.


Our phreindly feasant still with us.


Plasterboard between the studs. Takes longer but the end result looks good.


The open studwork between the main bedroom and the double height area is disappearing as they fill in the gaps with plasterboard.


Apple trees in the neighbour’s garden. We're thinking we will plant a few ourselves once we're in. Maybe an orchard in part of the field.


Some blackberries from our garden, such as it is.


Painting the boards as they go up.


Postman pat’s car round the back


Issues considered this week have centred around :- how much studwork and purlins to show and how to do the painting of the weatherboarding in a heatwave. (Even took my shirt off on site on the Saturday afternoon - figured, if it's OK for the guys during the week, it's OK for me.)

And finally


Sunday 8 January 2012

Week Thirty Four - Carpentry, Joinery, First, Second

Not sure whether the stuff that went on this week is carpentry or joinery or corresponds to first or second fix. Door linings were installed but the doors and architraves won't go in for ages. So I guess it's first fix. Good to see we're getting there, though.


More window frames delivered and painted ready to be hung. Do you hang a window frame? Insert? Install? Put up? You definitely hang a door, so maybe you'd hang a window. But the window frame? And what if the frame and window come together. Does your head in, doesn't it.


Still with electricity 1st fix. The most direct route from one end of the barn to the other is under the floor. There's already ducting under the oversite, the concrete base, which carries the mains supply to that end of the building. I believe they call it a sub-main, and there will be a consumer unit for the services at that end. However there's still a need to get across the entrance hall, which is double height, with other circuits - TV, phone, lighting. And since there's no floor above it's not obvious how you do that. One way is to put smaller gauge ducting across the top of the oversite. It will disappear beneath the celotex and floor screed which will go on top of the oversite.


Here's the rockwool going in between the studs. We're using rockwool not sheep wool as it's so much cheaper. Not too happy about it, nor are the guys - it's nasty itchy stuff. Ah well.


A window frame installed. You can see it's on the wonk, as they say in Suffolk. But of course the whole timber frame is on the wonk. There are no straight lines, no right angles, no verticals (apart from the ones newly installed.) But that's all part of the charm of the place, no?


Thought long and hard about window furniture - latches and stays. Didn't want anything too ornate or too modern. Eventually opted for black iron monkey tails. We spent ages looking at different manufacturers, eventually deciding which one we wanted. It turned out that only one of them did the sizes we require so we needn't have bothered. But we now know all there is to know about black iron window and door furniture - which is not a lot compared with, say, egyptology or brain surgery, but taxing nonetheless.


Progress with the wall construction is steaming ahead. And talking of water vapour, you need a vapour check barrier - a kind of vertical DPM. Actually, the black plastic stuff used for damp proof course is about the cheapest material you can get for the job so guess what ... 


They've started putting up the plaster board too. Amazing the difference it makes when a wall really becomes a wall. If the open studs give you an idea what the enclosed, delineated spaces are going to feel like, filling in the gaps makes it real. Here's a section of the top of the wall between the main bedroom and ensuite bathroom.


We're having a small loft in certain areas, mainly to have somewhere to put the heat recovery units and also to provide a means of running services along the length of the barn. And where you have a loft you have to have a loft hatch opening.


Water quality - bit of an issue. The initial tests by the local authority environmental health people revealed that the water coming out of our borehole is high in iron, manganese, has traces of ammonia and, worst of all e-Coli. Altogether, not recommended for making tea with. So we're having some more tests to confirm the findings and decide what level of filtration and treatment our water will require. So much simpler if you can just connect to the mains and turn a tap on, don't you think?


They've moved round to the east side with the weather boarding.


View of the farmer's field out the back ready for the next sowing.


Our field to the left with its crop of grass for hay production, and farmer’s field to the right ready for a new planting of - I've no idea what.


Issues this week have included - the rockwool problems, painting the weather boarding, need for a design for the reinforcment behind the garage wall, how to ensure sufficient ventilation for the wood burning stove.
The rockwool irritation means facemasks, gloves and disposable suits. Maybe sheep wool wouldn't have been that expensive after all.
We've had a painter on site doing the window frames before they go up. We're planning to paint the weather boarding ourselves. It comes in painted black but needs another coat. Our painter has very kindly explained the best way to do it - start at the top and work down, keep a wet edge, use a medium sized roller rather than a brush, cover up the brick plinth where you're working. All good advice.
Did you know that for each kilowatt of heat from a wood burning stove you have to allow 550mm squared of fresh air vent. And to measure the area of an air vent you have to measure just the holes.  We're having a 9kw stove so we need a total of 4950mm squared vent. Amazing what you learn isn't it? Going to be so useful later on.

And finally