
The weather boarding on the southern projection has been removed exposing the studs which make up the frame.

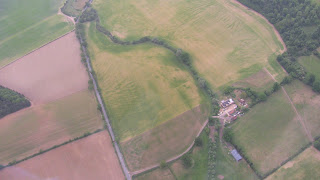
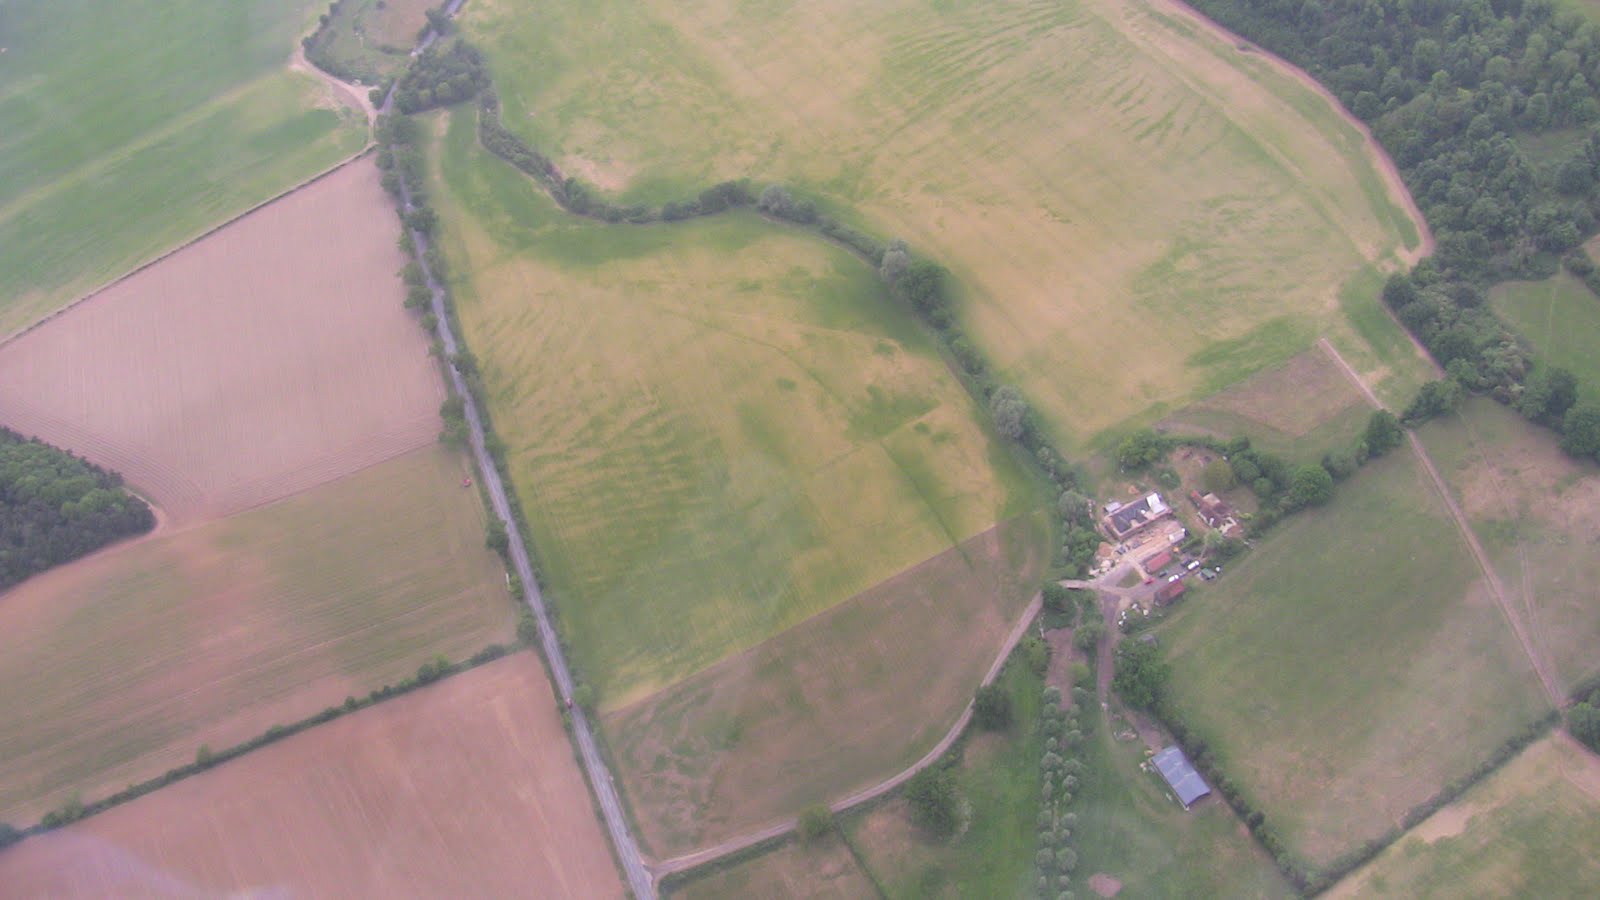
Went flying again this weekend and got my passenger to take a few aerial shots of the barn. It's surprisingly difficult to get a good picture. Maybe I could do with a better camera? A camcorder in still mode is perhaps not the best thing I could use, although it's OK for my other photos, no?


In the back garden our statue stands waiting patiently. She doesn't seem to mind being left alone all these months.

The facing brickwork at the at the north end looks great.


If you have a close look at the bricks near the corner you'll see what I'm told are called queen closers, one on each course of bricks on alternate sides of the corner. Dictionary.com defines a queen closer, or closure, as a brick of normal length and thickness but of half normal width, used to complete a course or to space regular bricks, or a brick of half the usual length, for completing a course or for spacing regular bricks. But no doubt you already knew that, having looked it up on Wikipedia following our last discussion on the matter. Discovered a new bond the other day - rat trap bond. It's essentially the same as the flemish bond, which we already know and love, but the bricks are are standing on their side instead of lying on their back. That is to say, instead of seeing headers and stretchers you see rowlocks and shiners. Right?

The fascia boards bought in last week need staining black before they get put up. Suffolk timber barns, and probably elsewhere too, are usually black. That's because in the 19th century every town had a gas works and black pitch was a by product of the process they used. So farmers could get it cheap to paint on their barns as a wood preservative. Prior to that timber frame barns were timber coloured. Nowadays the view is that the traditional colour for a barn is black. Depends on your historical perspective I guess. Reminds me of a comment allegedly made by a recent Chinese leader when asked if he thought the French Revoloution had been good for France. He paused for a moment and said 'It's too soon to tell.'

At the north end, now that the plinth is done, the cladding can come off. Amazing sight seeing all that timber frame exposed to the light. Bit like seeing a skeleton. At one level it makes you feel a bit queezy, at another level it has a certain fascination, like a strapless gown. What's holding it up? How does it all hang together. What's connected to what, what supports what. How does it all work. And that sparks thoughts about the skill of the people who put it all together in the first place. Bit humbling really.

More celotex going on the roof. It's not glass, it's the reflective foil on the outside of the insulation boards.


I really love the view of the fields from the scaffold with the wood beyond. Pretty as a picture.

More of the cladding coming off - this time the west wall

The question is, what to do with all that cladding? Good thing we're having a wood burning stove installed. Kindling for years to come I suspect.

Once the cladding is off, OSB is nailed to the frame. OSB - Oriented Strand Board. Never heard of it, myself. It's like MDF or chipboard but a lot more durable and weather resistant. The OSB stiffens the frame as well as giving some substance to the wall structure.

With the tiles off and the black polythene sheeting rolled back you get a fantastic view of the roof timbers, the rafters, purlins and new ceiling joists.

OSB on the south gable end.

The underpinning and repairs to the frame are finished so no further need for acrows and needles. Which means we have a pile of redundant railway sleepers and lumps of green oak. Have to have a look at a knitting website to see if I can find a pattern calling for 2 metre long wooden needles. A seriously chunky Arran sweater perhaps?

Waste celotex. There seems to be an incredible amount of waste inherent in the building process.

We're still struggling with the schedule, or lack of it. On a commercial site there'd be a project manager of some sort who'd have the responsibility of drawing up, and monitoring progress against, the schedule. This would make it easier to ensure that resources - men, materials, tools, designs, permissions, you name it - are all in place as and when needed. Typically somebody needs to be asking at each stage, maybe each day, what's happening next, do we have all the resources we need for that? Since we're doing the project management and are on a very steep learning curve (which is a polite way of saying we don't have a clue) there's the continual worry that the guys are going to be standing around waiting for the nails to turn up next Tuesday. Fortunately that hasn't happened yet but we seem to be in fire fighting mode much of the time. The builder is great, answering our naive questions, prompting, explaining the process, suggesting sources of materials. But he has his own job to do and sometimes we miss things and find ourselves driving around to pick stuff up which is urgently needed.
The upstairs windows on the plan are shown right under the wall plate. Unfortunately that would mean the tops of the windows would be under the fascia boards fixed to the rafter feet and carrying the gutters. Gonna have to think about that one.
Since the central part of the barn will remain double height, there is a problem with how to get services (electricity, plumbing, ventilation) from one end of the building to the other. We eventually decided upon a high level ceiling, about a metre below the ridge, creating a triangular cross-section tunnel under the apex of the roof. This still leaves a drop of 6 metres from ceiling to floor which we reckoned was ample, and has the added advantage of hiding the new purlins.

Another snag which hit us this week was the height door at south end. Because of an earlier decision about the finished floor level in that area, the head of the existing opening is only high enough to allow a 6 foot door instead of the more usual 6 foot six. (I'll discuss units of distance later ...) Lifting the head of the door would mean more surgery to the frame - chopping tenons on the ends of the transom, reducing the studs above and re-cutting their tenons. Not a huge amount of work but we decided we could live with a 6 foot door. We might put a picture of a duck over the door ... geddit?

Concerns about the tension in the trusses holding the sides of the building together, and discussions with our engineer, led to the design and commissioning of reinforcement brackets to fix steel rods running across the top of each of the three trusses. It's not pretty but it means the walls won't splay outward when the roof is put back on.

And finally


No comments:
Post a Comment