
The arrival of a cement mixer on site reminds me of that famous 2nd world war photograph of troops raising the US flag on the island of Iwo Jima. Maybe this is our Iwo Jima moment. The moment when reconstruction starts. There’s still a lot of demolition to take place, but where there’s a cement mixer, there’s cement, which means bricklaying is about to kick off. The end of the beginning. Or am I getting carried away?

The name is Bond. English Bond. I think I’m turning into a bit of an anorak. I’ve started to get into brick bonding. I find myself gazing lovingly at brick walls trying to spot the pattern of the brickwork – the bonding as it’s know by the cognoscenti. Firstly, note that the long side of a brick is called a stretcher, and the short side is called the header. As everybody knows, English bond consists courses of bricks laid so that the face of the wall shows alternating rows of just headers and just stretchers. Flemish bond consists of rows in which headers and stretchers alternate within the course of bricks. The usual Flemish bond is header stretcher header stretcher. What would you call a wall which shows nothing but stretchers? Boring, yes, and it’s known as stretcher bond which is sadly just about all you see these days. Ah for the good old days. Now, looking round the barn it seems as though the original bricklayers made things up as they went along. Maybe they threw dice every morning. The bond on the barn consists of English bond for the lower part of the plinth and several different variations on Flemish bond in the upper courses. In some places it’s 2 stretchers, a header, 2 stretchers a header. Sometimes 3 or 4 stretchers and a header. And then they throw in a row of headers or a row of stretchers just for fun. Does your head in doesn’t it. I need to get out more.

As far as I can see underpinning seems to consist of excavating under the foundation

and then pouring a load of concrete into the hole.

The hole is shuttered both sides of the wall with large sheets of plywood to shape the concrete as a defined block under the wall rather than an enormous blob. At the cost of the stuff I’m all for that.

And when it’s gone off (set, to you and me) you remove the shuttering and backfill the hole with rubble and top off with soil. This is done at hit and miss intervals along the wall, and then you go back and do the gaps in the same way so you end up with a continuous foundation a metre deep.

If you think that sounds like it takes ages and costs a fortune you’d be right.
The concrete for the underpinning arrives on the back of a lorry
The concrete for the underpinning arrives on the back of a lorry

I was waiting to pay for the concrete, feeling guilty at just standing there watching the guys running back and forth with barrowloads of concrete

It occurred to me to join in. I asked one of the guys if I could do a couple and, surprise surprise, he promptly gave me his barrow. (To be fair, he did go and get himself another one...) So I did few barrow loads. Cheaper than going to the gym. Mind you, I walked, and, when it came to shooting the load down the slit between the shuttering and the wall, I left that to the experts.
The floor in the north projection, the utility room, had to be lowered by around a metre.

More tiles were taken off the roof

which the guys seemed to enjoy doing

We had state of the art gravity powered technology for getting the tiles down to the ground. It will be interesting to see the machine working in anti-gravity mode when they put the roof back on.

On his first visit the warranty inspector said that the roof tiles should be nailed down to prevent them from being lifted off by wind pressure. This meant that they would have to be drilled – all 4000 or so of them.

The builder suggested that if we had nothing better to do we could get some drill bits and start drilling. At first I thought he was joking but next day asked him if he was serious. I was disappointed to hear that he was serious. So I went down to the local diy supermarket, bought 3 masonry drills and rummaged around in the garage to find the Black and Decker the family had bought me some years previously. It had been used about twice, maybe three times in all that time. Poor thing was in for a shock.

Courtesy of our newly installed cement mixer, rebuilding the southwest plinth wall began

On top of the concrete foundation poured earlier you add a couple of layers of engineering bricks, (hard, water resistant) a generous helping of regrades (euphemism for seconds - you don’t need perfect bricks below ground level, seconds will do fine)
Leave for a few days to marinade (go off, set) and top it off with several layers of blockwork (you will by now, of course, instantly recognise the blockwork version of stretcher bond)

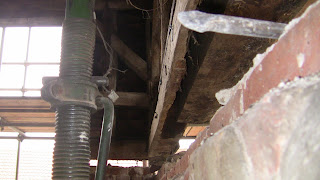
Once the plinth has fully gone off the timber frame, specifically the sole plate, a piece of oak several metres long and 7 inches by 8 inches cross section (yes I know that's mixing my measures but that's what they do ...) is lowered onto new plinth


Talking of sole plates and wall plates, had a bit of a shock when one of the pieces which, from the side, looks in good condition, turned out to be rotten in the centre. Nuther couple of hundred quid to stump up, ordering a replacement piece of green oak.
This meant, had to get the acrow jacks up under the top wall plate taking the weight of the frame it from there. So, on the blower to track down some tall acrows.
Had a bit of rain overnight so the stream is in full spate.


This meant, had to get the acrow jacks up under the top wall plate taking the weight of the frame it from there. So, on the blower to track down some tall acrows.
Had a bit of rain overnight so the stream is in full spate.

And finally ... a couple of shots to illustrate this week's developments


No comments:
Post a Comment