Stairway to heaven - or to the main bedroom, at least. Fantastic that the stairs have at last arrived on site. Fantastic to have stairs rather than ladders. Beginning to look like a real house. It'll be a few days before we can actually walk up them. But imagine that.
After much soul searching we selected the sanitary ware bits and bobs, and here it is on site. We've been advised that it should be installed and/or locked away pronto as it's the kind of thing that tends to grow legs.
Big shock when we went upstairs at the north end. It had been out
of bounds for several days to let the screed go off before people walked on it.
Unfortunately the windows up there had been left shut which meant that the air
in those rooms got seriously damp. The screed is a moist mixture of sand and
cement. As it goes off and dries out it releases a lot of water into the
atmosphere. If that that damp air is not ventilated out of the building the
result is rust spots and mildew on our lovely, brand new, plaster – also itself in the
process of drying out and releasing yet more water into the air. Panic at
first, thinking we’d have to strip off all the plaster and get it re-done.
Showed it to our decorator and he said no problem. Just let it dry out
completely and the mildew would die and could be washed off. The rust spots,
where the plasterboard nails underneath had rusted and discoloured the plaster,
could be dabbed with a stain cover paint before the walls are emulsioned. So, a
bit of a pain but not a disaster. And shouldn’t result in any delay to our
being able to move in.
The primary electrical distribution board is in the plant room. Due to the size of the building and the number of rooms, we're having submain distribution boards for each end of the barn. Here are the input and output cables for what will be submain no. 1 serving the utility room and most of the north end of the building.
East cart door frame being installed. Love the wonky post above. The dead straight lines of the modern door frame accentuates the wonkiness of the timbers above. You love that or hate it. Me, I love it.
... and really pleased with the detail of the corners, base pattern, vents. We've visited most of the woodburning stove suppliers in the area and took a few pictures on a phone of the detail round the hearth. Printed them out and gave them to our bricklayer. He's done a really good job. Eventually decided to buy the stove through the builders merchants we've been using all along. They were a bit cheaper than the shops we've contacted.
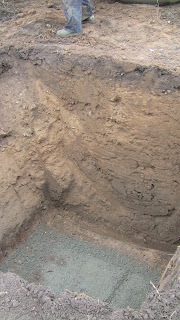
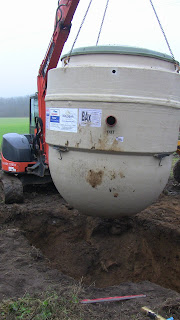
A condition of the original purchase was that we have to build a brick wall at the north end of the property. Problem is the ground floor of the barn at that point is below ground level outside so the wall of the barn and the garden wall behind it have to be retaining walls. In fact, since we've lowered the ground level next to the barn to approximately finished floor level for the ground floor inside, it's the garden wall which has to be a retaining wall. There will be a difference in ground levels of about a metre, more in places, between the ground on either side of the wall. And, if you've been following the plot up to now, you'll know that retaining walls need serious foundations involving cubic metres of steel reinforced concrete. And you have to start by digging a big hole to pour the concrete into. That means we've had to bring in the digger and dumper ... again. More expense, but it needs to be done. Hopefully it won't take too long.
Issues we've been thinking about this week have included: how to clean off the plaster which has splashed onto the studwork. The plasterer suggested vinegar but we shall see. Also details around the garage roof - which of the possible alternative to choose for all sorts of things. This week ordered, and in some cases, received a lot. There's the garage doors from an outfit in town (not the internet just yet,) loft hatches. valley boards and fascia boards
And finally


