Thursday 26 May 2011

Week Eight - of Scarf Joints and Sheep Wool

The barn is built on a slightly sloping site, north to south. One way of coping with this would be to have floor levels that step up as you move through the barn. The problem with doing that is you soon run out of headroom -  the trusses across the barn, are all at the same level.  So at the north end of the barn we’ll have to dig the floor into the slope. This means that the ground level at that end on the outside will be a bit higher than the floor level on the inside.

 
The north plinth wall of the barn has had to be ‘carefully taken down’ and rebuilt as a reinforced retaining wall made of high strength blocks and faced with reclaimed bricks.


Our engineer specified the use of  reinforcing bars in the foundation of the wall and stainless steel reinforcing mesh embedded in the mortar.


We're using something called Bricktor and had to ring round the country to find the right type and width. Eventually found a supplier in Somerset. And yes, you've guessed it - good thing I've got another arm and a leg stashed away.


Scarf Joints - The main trusses span the barn and hold the sides of the building together. Unfortunately they have completely rotted away at one end – the dreaded valley problem. There are 3 of them and they measure roughly 9 inch by 9 inch by 6 metres. We were surprised to discover that they're in fact softwood. Serious lumps of wood nonetheless.


Replace or repair? It seemed a shame to condemn such large timbers, which are otherwise in reasonable nick.


Our builder, joiner carpenter and jack of all the other trades, cut back each truss to sound wood and fashioned a new piece to fit.


To my mind the result is a fabulous piece of carpentry. Might get the electrician to install spotlights.


I’d never noticed before, but the slope of the roof sweeps up a bit at the bottom to throw the rainwater out from the wall. They call it a kick and, spookily, it’s achieved by attaching bits of timber called feet to  the bottom of each rafter.


Did I mention cripples? They’re the short rafters up the side of the valley. They’re called cripples because they’ve had their feet cut off. Charming eh?


I’ve just thought of a Modified Rule of thumb for telling the difference between cabinet making, joinery and carpentry. I’ll call it the  Splinter Test. What you do is run finger over it and see whether you get a splinter. (Perhaps that should be 'run your thumb over it', as this is a rule of thumb after all.) If you don’t get a splinter it’s cabinet. If you sometimes get a splinter it’s joinery. If you always get a splinter it’s carpentry. Cool huh? Can’t wait to try it out.

This week saw the construction of the manhole around around the borehole. 


At the beginning of the week a cement base was poured. A super duper brick surround was built at the end of the week.


The driveway from the road crosses a little bridge over a stream and swings left in front of the barn up to where the garage will be. The problem is, because they had to abandon the first borehole, the top of the well and the manhole cover are now smack in the middle of the drive, or at least, in the middle of what will be the drive. The advice is that it's not a problem - you just put a strong enough manhole cover on it. But I'm not happy with it. I don’t really want our water borehole to be in the middle of the driveway so we're looking at alternative routings, maybe putting the entrance south of the borehole and swinging the drive around it. Well well well.

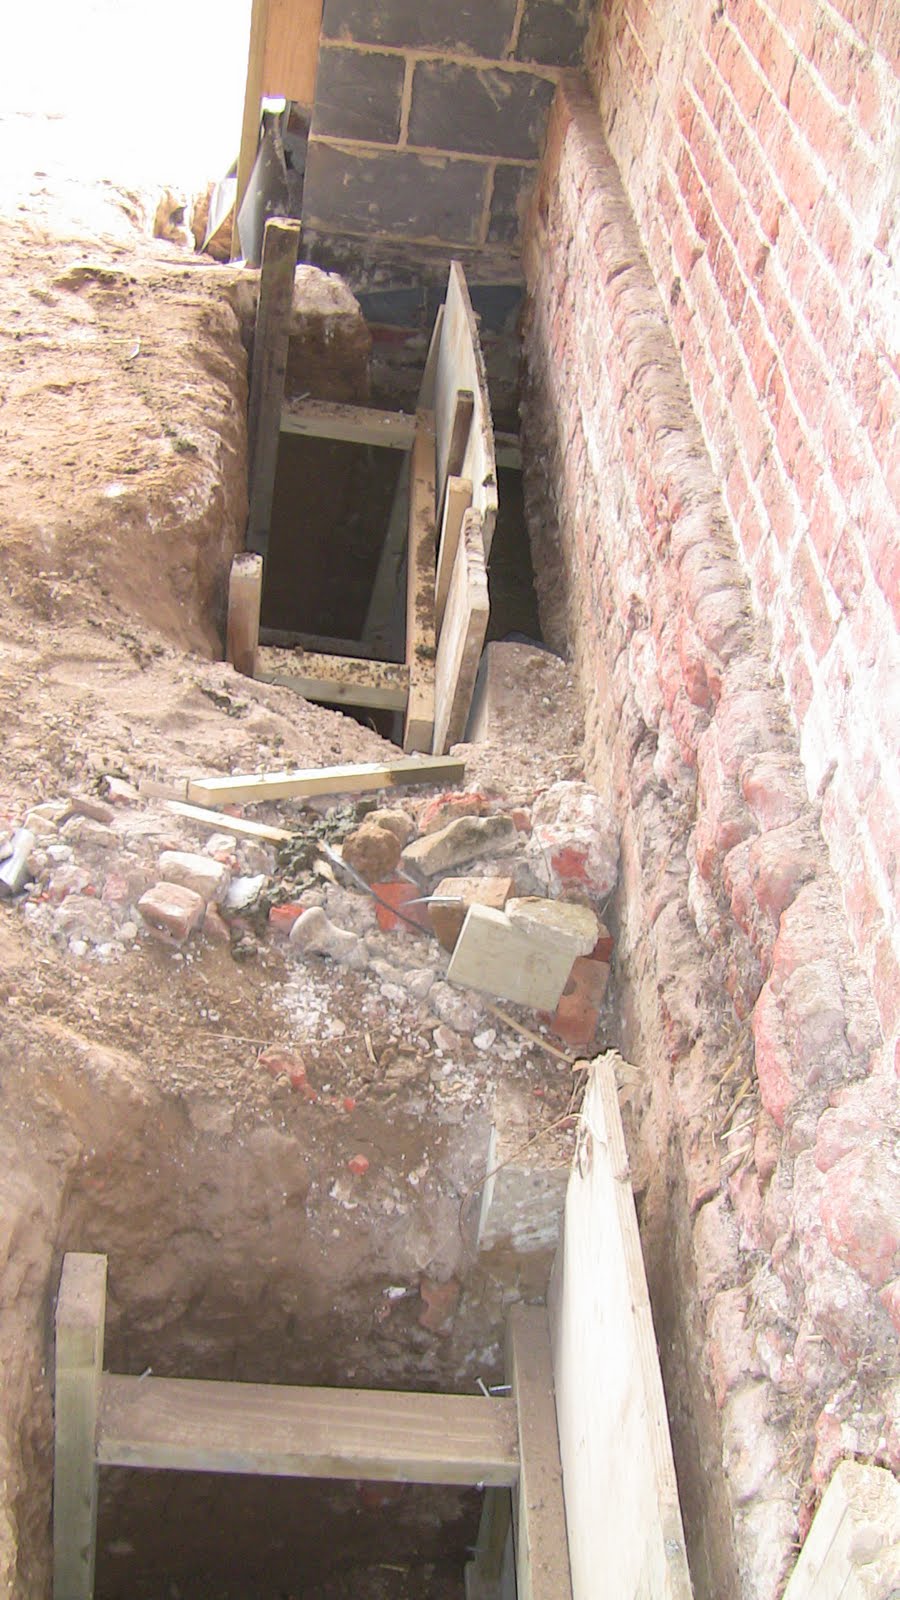
Underpinning and concrete foundations north, south, east and west this week. 80% done and 80% still to do.
The utility room doorway with the frame held up on acrows. Note different levels inside and out. 

We're still agonising over the wall construction. Celotex just between the studs won't give us the U-value we need, and Celotex outside and between the studs will. The difficulty with that is that cutting and shaping the Celotex between the studs is very labour intensive. So we're looking at using Celotex outside and sheep wool between the studs. We reckon we've got the depth of stud to be able to fit in enough wool to achieve the level of insulation we want, while avoiding the extra labour cost. Sounds too good to be true. There is a down side of course. It means we'll be covering up most of studs leaving only the principle posts visible. And there's the issue of vapour control to think about.  Nothing's ever simple is it?

In an article in one of the housebuilding and renovating comics the writer says that he often got depressed over how long it was taking and how much it was costing. He went on to say that visits to the site usually lifted his spirits as he got back in touch with why he'd taken it on in the first place. We go to site pretty much every day, and I know exactly what he means. Here's a view from the scaffold which never ceases to amaze me. The fields, the trees, the church tower in the distance. Pretty as a picture.


And finally, a couple more frames for the time lapse movie


Monday 2 May 2011

Week Seven – Decisions Decisions

To cap or not to cap, that is the question. The barge boards on the end of the roof are topped by capping boards. These are characteristic of Suffolk timber frame barns and therefore to be retained at all cost. On the other hand they're an absolute pain. They spend much of their life wet,  rot in no time, and have to be replaced every five years or so. Which means paying for scaffolding and days of work removing, replacing, repairing - all for a couple of bits of timber. The alternative is just to cement over the ends of the tiles, which lasts for 20 years. You pays yer money and you takes yer choice. I suspect there's really not much choice in this case. Of course we could use hardwood for the capping boards which is more expensive but could be cheaper in the long run. But then, as Keynes pointed out, in the long run we're all dead.

The new brickwork meshing into the existing plinth looks really great to me. Actually it's only new in the sense that the bricks have been cleaned and re-laid. For me there's something appealing about the old and the new butting up against each other like that. It's about vitality, preservation, new life. Or am I getting carried away again? What I don't want is for the barn to look completely new and fresh as if it were just a modern building built in a barn style. I want the grotty bits to remain. Well, perhaps not the really grotty bits ...


New meets old on the northwest plinth.

The plinth at the front of the South projection is coming together.
As it was ...
... taken down


... and re-built.


And the southwest corner, where the buttresses were, is also getting its facelift

Underpinning just goes on and on and on. Digging holes, pouring concrete, digging more holes. It has to be done but there's not much to show for it at the end of the day. Reminds me of a swan gliding along. There's an awful lot going on underneath that you don't get to see.

We've been buying enough green oak to sink a battleship. Or maybe even build one. Hope Henry VIII'th doesn't want to repair the Mary Rose because we've cornered the market. Here's a piece for a new wall plate with mortises being cut ready for the tenons on the studs to slot into. (Just showing off that I'm beginning to get the jargon ...). The wall plate, or strictly the sole plate, is the horizontal bit along the bottom of a timber frame wall and the studs are the vertical bits. But you knew that already, didn't you.

Work on the timbers in the roof gathered pace this week. Here's one of the central valleys, a villain of the piece, where the main roof meets the central projection roof. The valleys have leaked rainwater for who knows how long, resulting in a huge amount of damage. Posts rotted away, joints crumbling and failing, allowing bits of the building which should be locked together to drift apart over the years. There's evidence of lash up repairs and bracing but the builder is having to replace all the rotten bits and attempt to pull the walls and the roof back into line.

Replacing rafters which are shot
Rafters, what rafters?
Humour me while I show off a bit more jargon - rafters & purlins. My understanding is that the rafters are the bits that run up the slope of the roof and the purlins are the bits that run along the roof. The roof has stood for nearly 200 years but the structure doesn't meet modern standards for strength and rigidity so our engineer has specified beefing up the purlins. Sounds simple enough. Just buy a bit more timber. Turns out we need 35 lengths of 5.4 metre 3 by 4's. Getting on for 200 metres. That's a lot of wood. Fortunately it's softwood so the arm and the leg are fairly safe ... for now.


An interesting joint. The wall plates and trusses, which should all slot together, have parted company. It's a moot point whether the rot caused the failure or the failure caused the rot. Probably a bit of both, once it got going, but was caused initially by the leaking valley. So let that be a lesson. Always look to your valleys, boyo.
Here's a curious thing - green oak is specified in metre lengths but in inches cross section. A serious piece of timber, one of the trusses which had to be replaced - 5.8m x 8in x 7in. Fortunately the delivery man was able to hoist it up onto the scaffold for us. Just as well as it weighs around 500lb. It's a wonder the frame stands up under its own weight, let alone carry the roof structure which weighs literally tons. I'll do the sums and let you know.

Oh to be in England now that March is here. It's not quite April but never mind, the daffs look great. The worst of the winter is behind us now. It is, isn't it?

Managed to go flying this weekend and did a couple of orbits over the top of the barn at 1500 feet. It's a noise sensitive area so couldn't do more. And didn't go below 1500 feet - honest guv. Got my passenger to take some pictures with my camera.


Still wrestling with floor levels and how many steps can we live with in the central projection which will be a kind of hallway. Running the floor level in the kichen area out into the hall means there will have to be 3 or 4 steps down to the outside ground level. Do we have them inside the front door or outside? Time for the builder to get the thoedolite out again. Lovely piece of kit. If only I understood what he does with it. Keep thinking I've got it, then some more numbers get thrown around and I realize that I haven't. Perhaps if I paid more attention. The original drawings and plans don't help either.
This week we've been looking for deals on fixings for the Celotex. They have to be long enough to go through the Celotex (100mm) a couple of battens and into the oak rafters. We don't want great thick bolts just to hold on the Celotex (very light). While the fixings have to be strong enough to support the weight of the tiles as they try to slide down the roof, and also thick enough to be able to screw into old oak without shearing off, we don't want to have to pre-drill each hole.  And we're going to need about 3000 of them just for the roof. There's also the walls to think about. There a couple of fixings on the market so a combination of price and a suitability check help us to decide which to order.

And finally,


And time to don our QS hat again - need to find suppliers for the timber joists & steel beams which will make up the first floor. We need to work out how many, how long, and where to buy them cheapest. It's fairly easy to do a rough count of what we'll need and use that to get quotes. But when we get to actually placing the order we'll need the precise figures and sizes - a job for the builder, methinks.